It is recommended reading the platoon basics page first.
The Rifleman
Everyone will typically have a weapon and act as a rifleman. Everyone will need to work with their buddy & group (typically a fireteam). Typically buddy teams will be issued with colours that will appear on the ShackTac HUD. Thoroughly understanding the basics is critical for the success of the team and longevity of your in-game life.
Core responsibilities of a rifleman:
- Watch your buddy/ies back. If one of you is wounded or killed the other can communicate with the rest of fireteam. You should be able to rely on your buddy, and likewise he should be able to count on you.
- Follow the instructions of your leader.
- Watch your assigned arc and maintain situational awareness.
- Communicate. You should pass on information such as new contacts you spotted to your leader.
Arcs
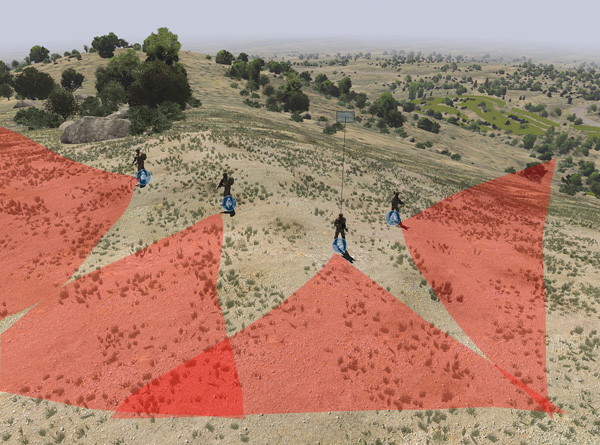
As a rifleman you will typically be assigned to other soldiers most likely a fireteam. The idea is that you will be more effective working together. A fireteam should aim to cover multiple directions with every rifleman being assigned their own arc/direction. This will then offer the most security for the team. Ideally the leader will specify the directions they want the element members to cover, however if they don’t you should naturally attempt to find one. The guideline with arcs is to minimize overlap with other people in your element i.e. watch a direction that isn’t already being watched. Ideally you want to cover an arc/direction that your buddy is not covering.
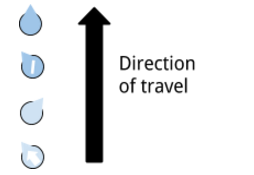
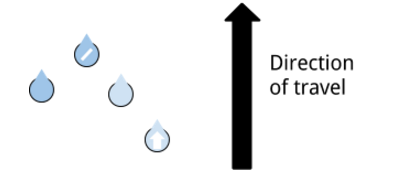
A fireteam in Wedge formation watching their assigned arcs. Above in 3D, below in 2D.
Cover and Concealment
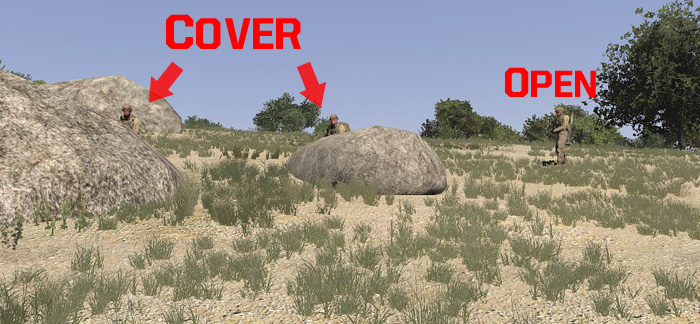
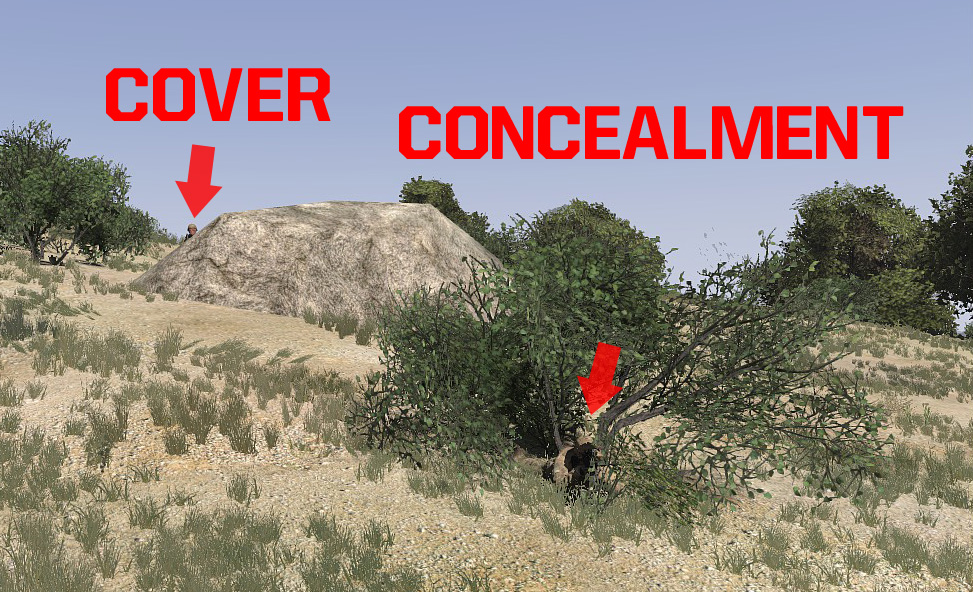
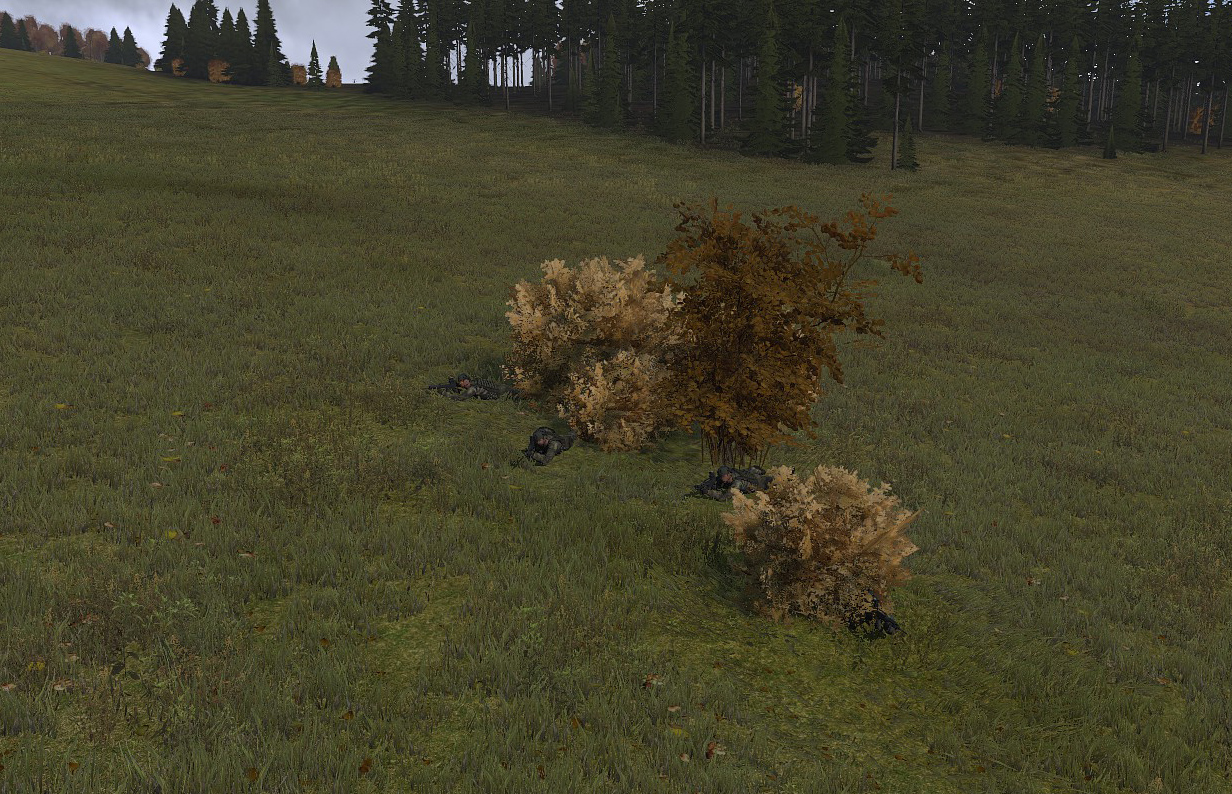
Cover is stuff that offers protection from enemy fire. Typically cover will absorb shrapnel/bullets. It is extremely advantageous to have at least some cover protecting you. It will allow you to be less exposed and to quickly hide (reload/too much enemy fire). In the image below you can see that the two soldiers in cover are harder to spot and considerably less of their bodies is exposed. The guy in the open terrain is extremely exposed.
Concealment is stuff that makes it harder to be spotted, but offers little to no protection from incoming fire, it also may not offer a retreat path to safety that isn’t exposed to enemy fire.
Generally movement should be made from cover to cover to maximize survivability, spending as little time as possible in the open, though it may well be necessary to move through open terrain. Smoke grenades can also be used to provide temporary concealment and may save lives.
Formations
The primary purpose of a formation is to get the best out of a given situation by placing people in the best possible positions. As a soldier it is vital to know where you need to be in a formation. Formations do not need to followed exactly and may be followed loosely e.g. If there is a rock 1m away that offers good cover. Get next to it and use it, as you will be more effective behind cover.
Things to consider when picking a formation:
- Position of enemies and friendlies - The core idea behind a good formation is to allow everyone to be able to quickly get in/or already be in position to open fire on the enemy, and avoid friendly fire! Knowing where enemies are likely to come from will allow you to ensure that your group is not incapable of returning fire.
- Arcs of fire - It is important that a unit is aware of what is around it 360 degrees so that it can not be surprised.
- Ease of Control - Sometimes having a formation that is easier to control can be advantageous to swiftly displace and adjust as needed.
- Place heavy firepower in the best position - It is best if your machine guns and heavy assets can immediately engage the areas that are most likely to contain enemies.
Line
In the line formation everyone is facing forward, side by side.
Strong point: Full firepower forwards, great for minimizing friendly fire when engaging front. Can easily switch to engage targets to the rear.
Weak point: Sides are exposed, only one soldier will be able to engage contacts directly on the sides, meaning the rest of the formation needs to relocate to engage. Rear is exposed, so periodically it should be checked.
Column
The column formation is a simple follow the leader. Every person should cover the opposite side of the person in front of them with the 2nd soldier covering the left, defaulting to left-right-left-right pattern after the front man. The rear man is responsible for scanning the rear of the group.
Strong point: Ease of control and speed. This is the easiest formation to follow for movement.
Weak point: Extremely vulnerable to attack from the front, only the pointman can immediately engage targets to the front. Most people need to relocate to engage, providing the enemy opportunity to do catastrophic damage.
Wedge
The wedge formation is the most sound option for protecting both the front and side flanks. The team can form quickly move into firing lines with with only half the unit needing to relocate if it is attacked on a flank. This should be the default formation for moving into unknown territory. If attacked from the sides now, at least half the group can immediately engage.
Strong point: Assault from the the sides, whilst being fairly strong against a frontal attack.
Weak Point: Attack from the rear.
Echelon
The Echelon is for use when contact is expected on only one side or the front. A wedge is usually a safer bet but if you have friendlies close on one of your flanks you may be able to assume that is is safe. For this reason echelons are usually reserved for movement as part of a wider formation within a larger group.
Above we have two fireteams using opposing Echelon formations.
Strong point: protects the flank the ‘line’ is facing with maximum firing support.
Weak Point: The Rear, the opposite flank and if enemies are slightly off the front to the opposite side.
Formation Scale
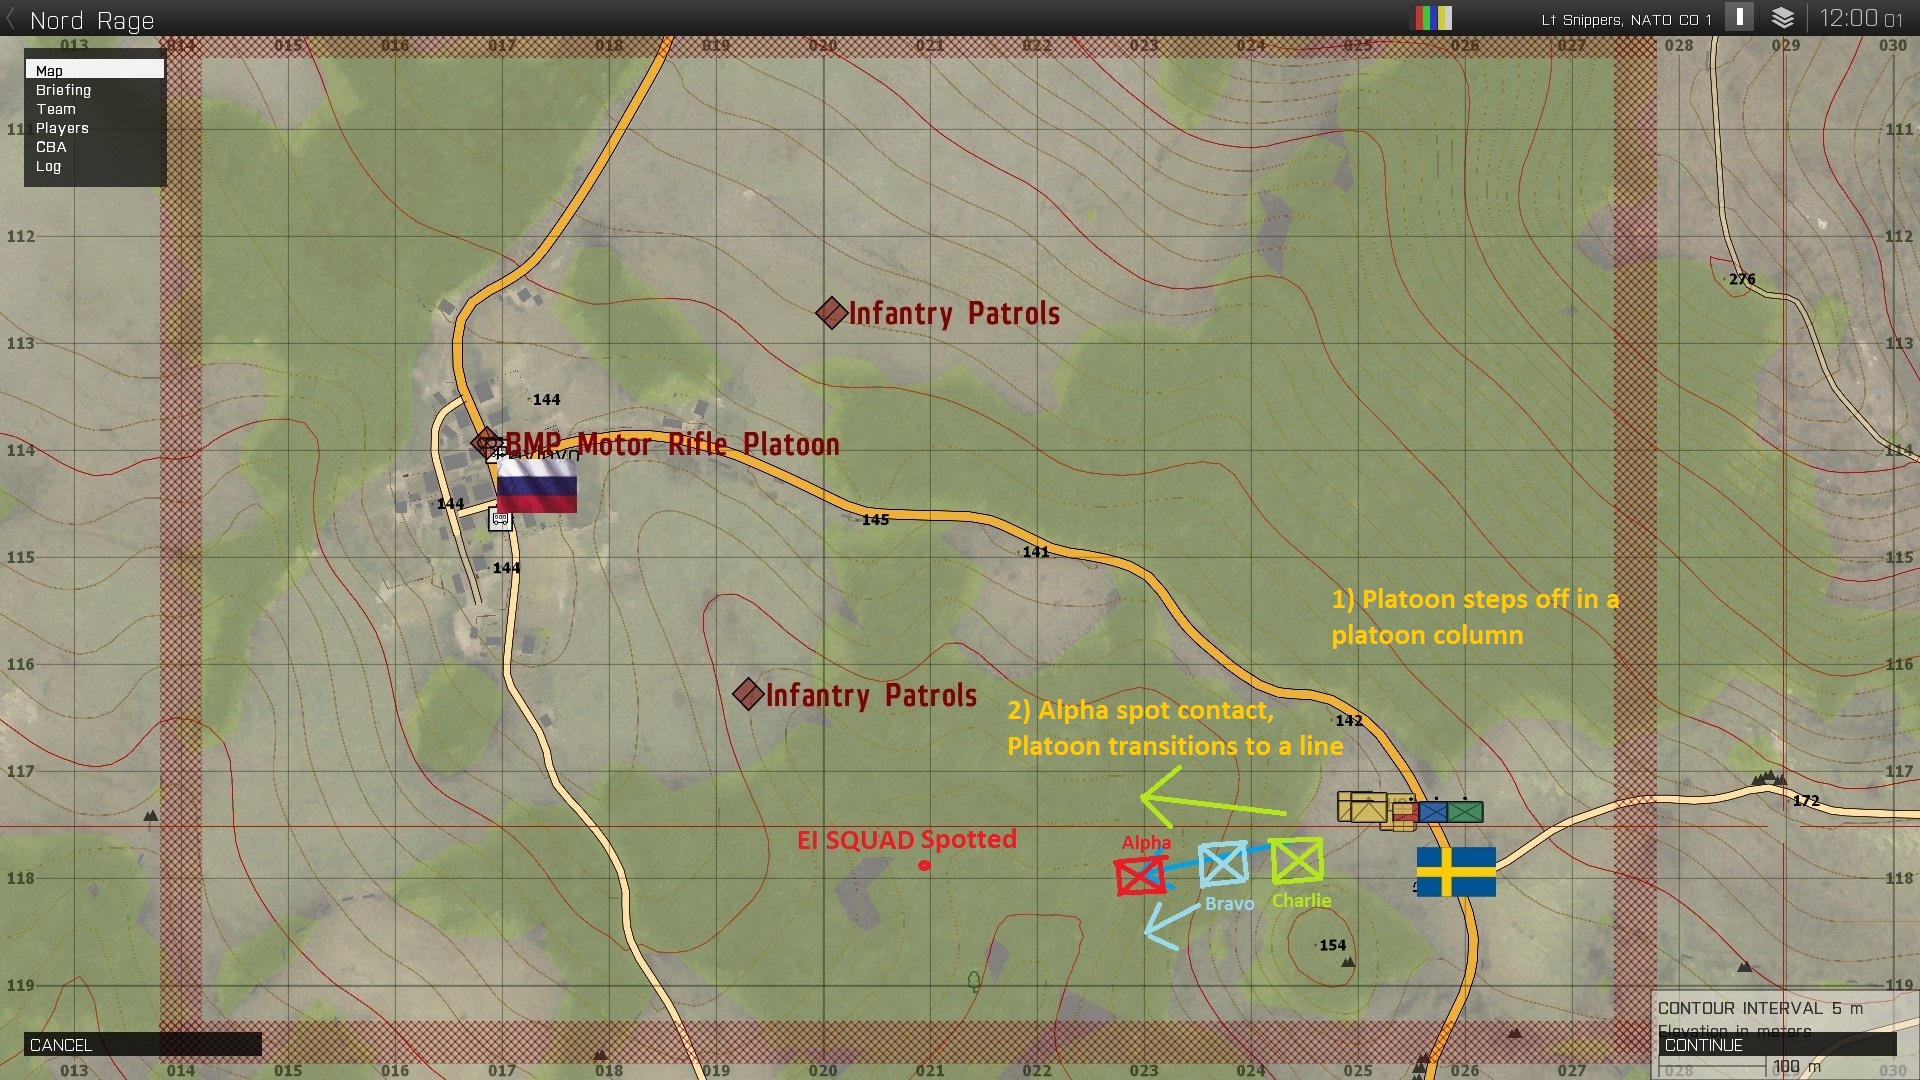
Formations can be applied at all command levels (i.e. Platoon, Squad, Fireteam). Unless specified the subunits leaders will pick the best formation. Typically formation choices are left to subunit leaders as they may have the best idea of what is best suited depending on terrain and other factors. Here is an example:
Example: Platoon column versus Squad column:
Platoon Commander: “Platoon form a column, Alpha on point, Bravo on the rear, 100m spacing.”
No squad formation is given so Alpha Squad Leader takes initiative.
Alpha Squad Leader: “Alpha form a column, 1 on point, 2 behind them. I’ll be at the rear, 50m spacing between fireteams.”
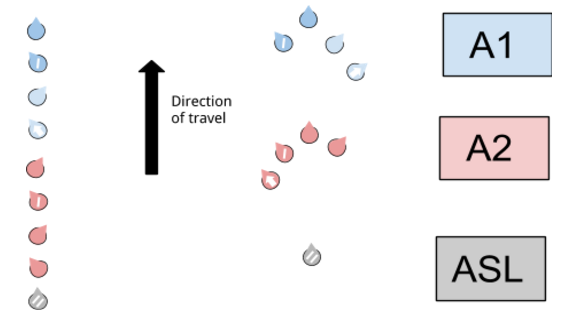
In the two illustrations below Alpha squad has adopted a column formation. The difference is that the fireteam leaders have opted for different formations. On the left the fireteams are in columns and in the right image the fireteams in the wedge formation.
Note: The picture below is not necessarily an example of good tactics but illustrates that formations at various levels of command can be implemented differently.
Spacing
Proper space is vital in both formations and in element positioning in general. It should be large enough so that the entire unit don’t get blown up from a single explosion and minimize the number of people that will get pinned.
- Ability to provide mutual support between elements.
- Survivability of elements.
Fireteam Level
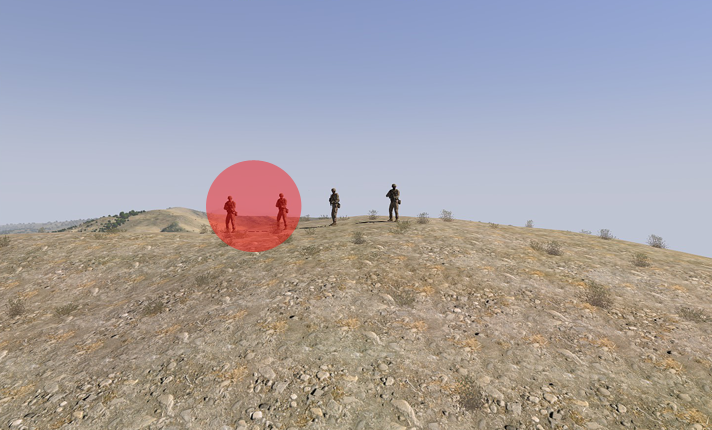
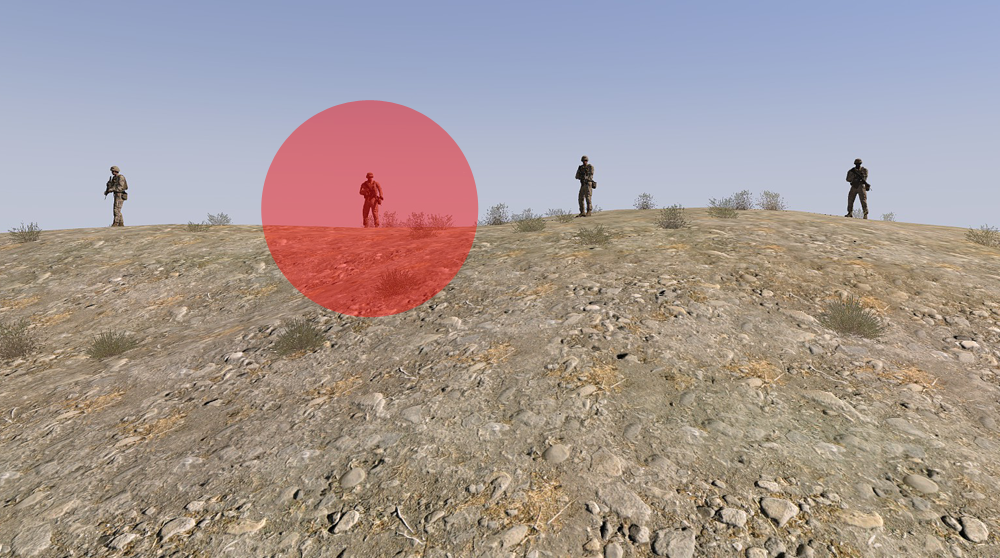
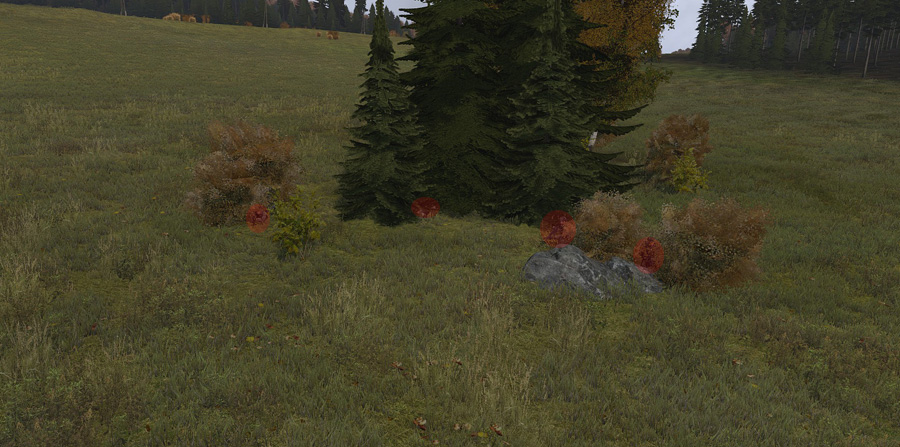
At the fireteam level spacing between individuals should typically be 5-15m depending on terrain & visability. While large spacing makes direct speech communication harder it can increase the survivability of the team. In the examples below, I have drawn the approximate dispersion of a machinegun with a red circle.
In the above due to the the limited spacing of the fireteam, it is extremely easy for a single machine-gun to suppress half the fireteam. By employing a larger spacing between soldiers the effectiveness of the machinegun to suppress multiple soldiers is greatly reduced, and more power will be required to suppress the entire fireteam. Also once the machine gun has finished eliminating one soldier he must then adjust his weapon further.
As a fireteam you should never be close enough to be taken out with a single grenade.
Squad Level
Ideally fireteams should always be able to mutually support each other with supporting fire if necessary, this requires that they be kept within a suitable distance to support each other.
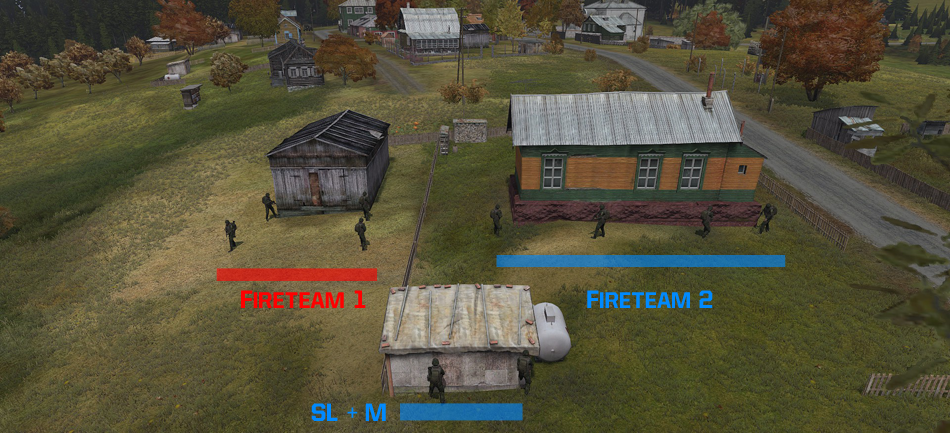
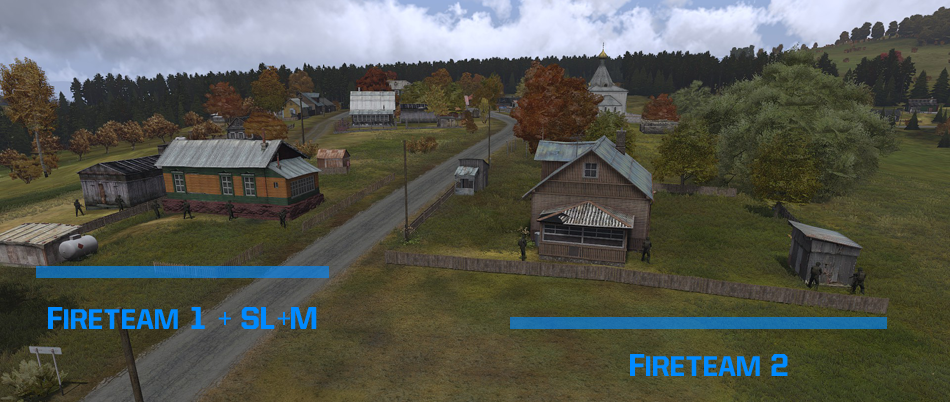
Similarly in urban situations at the squad level, efforts need to be made by leadership to ensure that fireteams are not too bunched up as shown in the first picture below. A general rule of thumb is that in the case of non-enterable buildings at most a pair or fireteam should be next to/behind them. In the second image below, a far better spacing is used.
Platoon Level
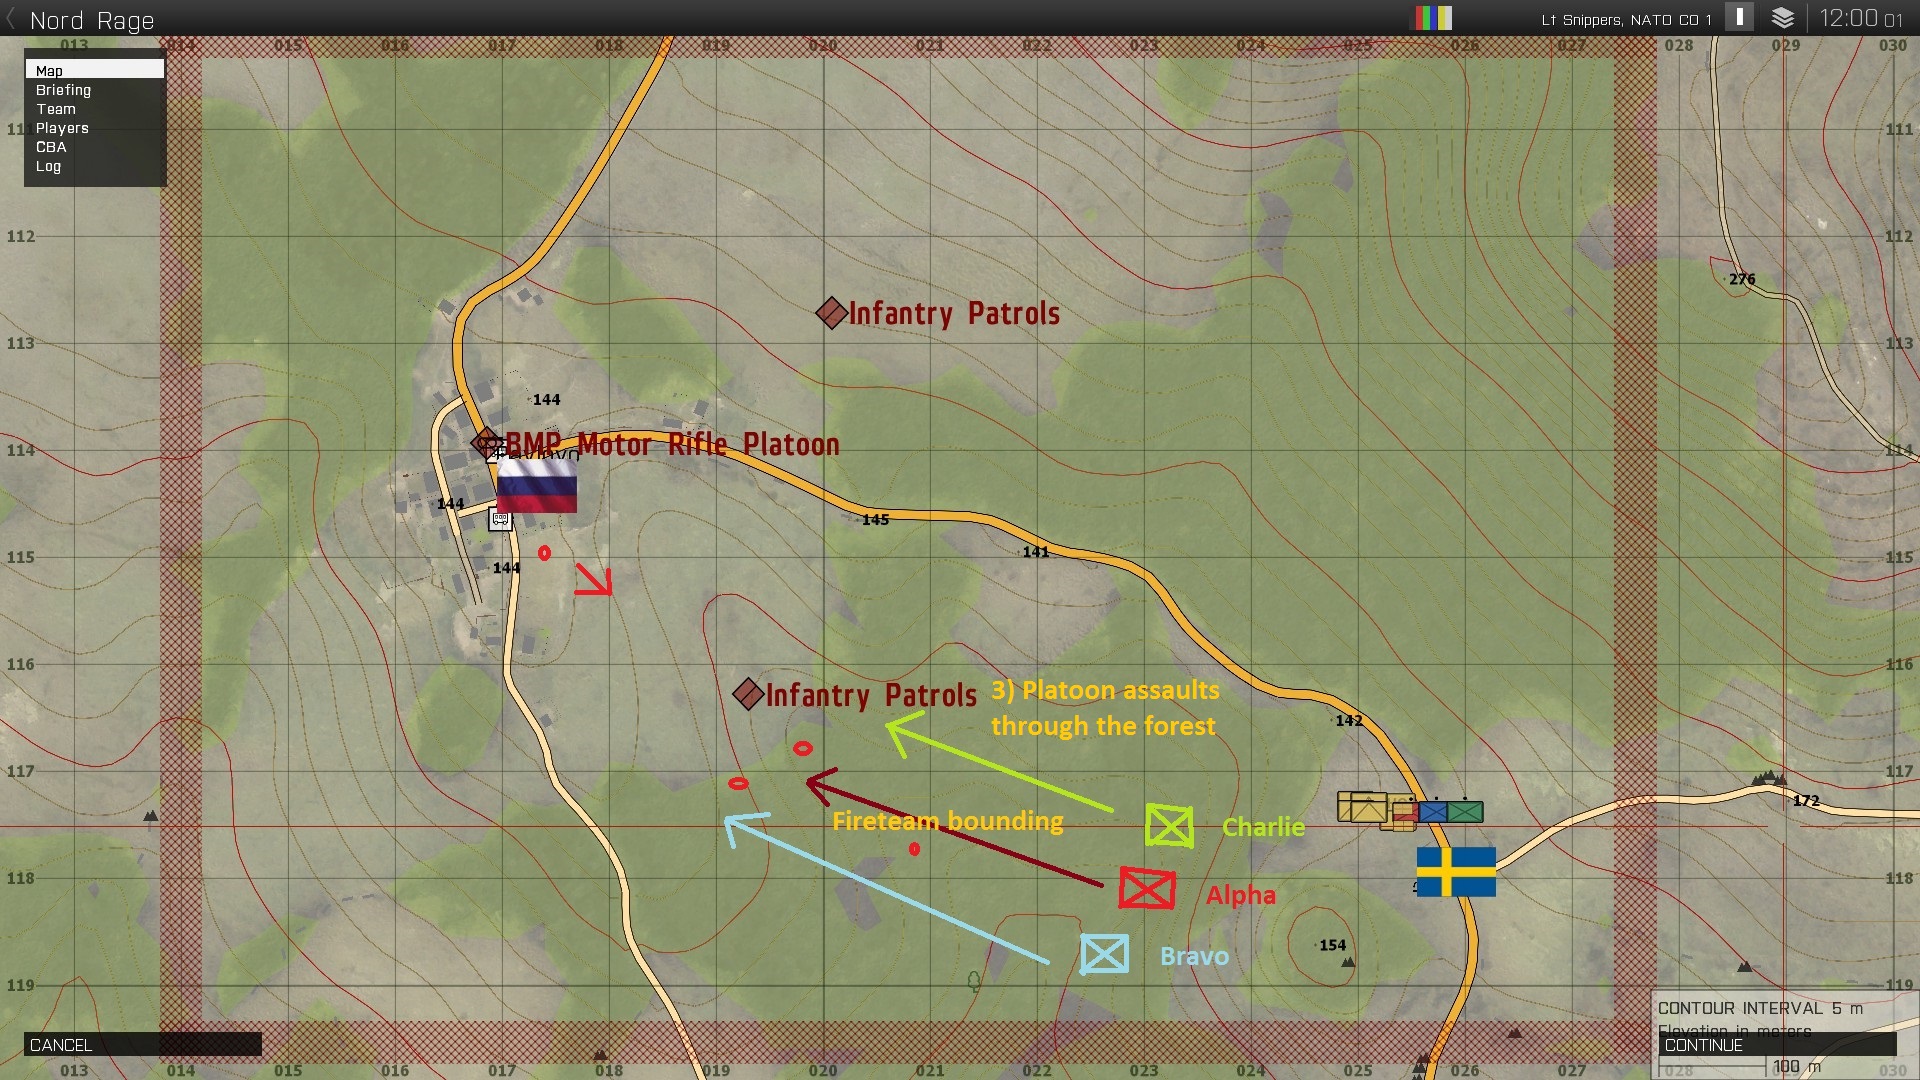
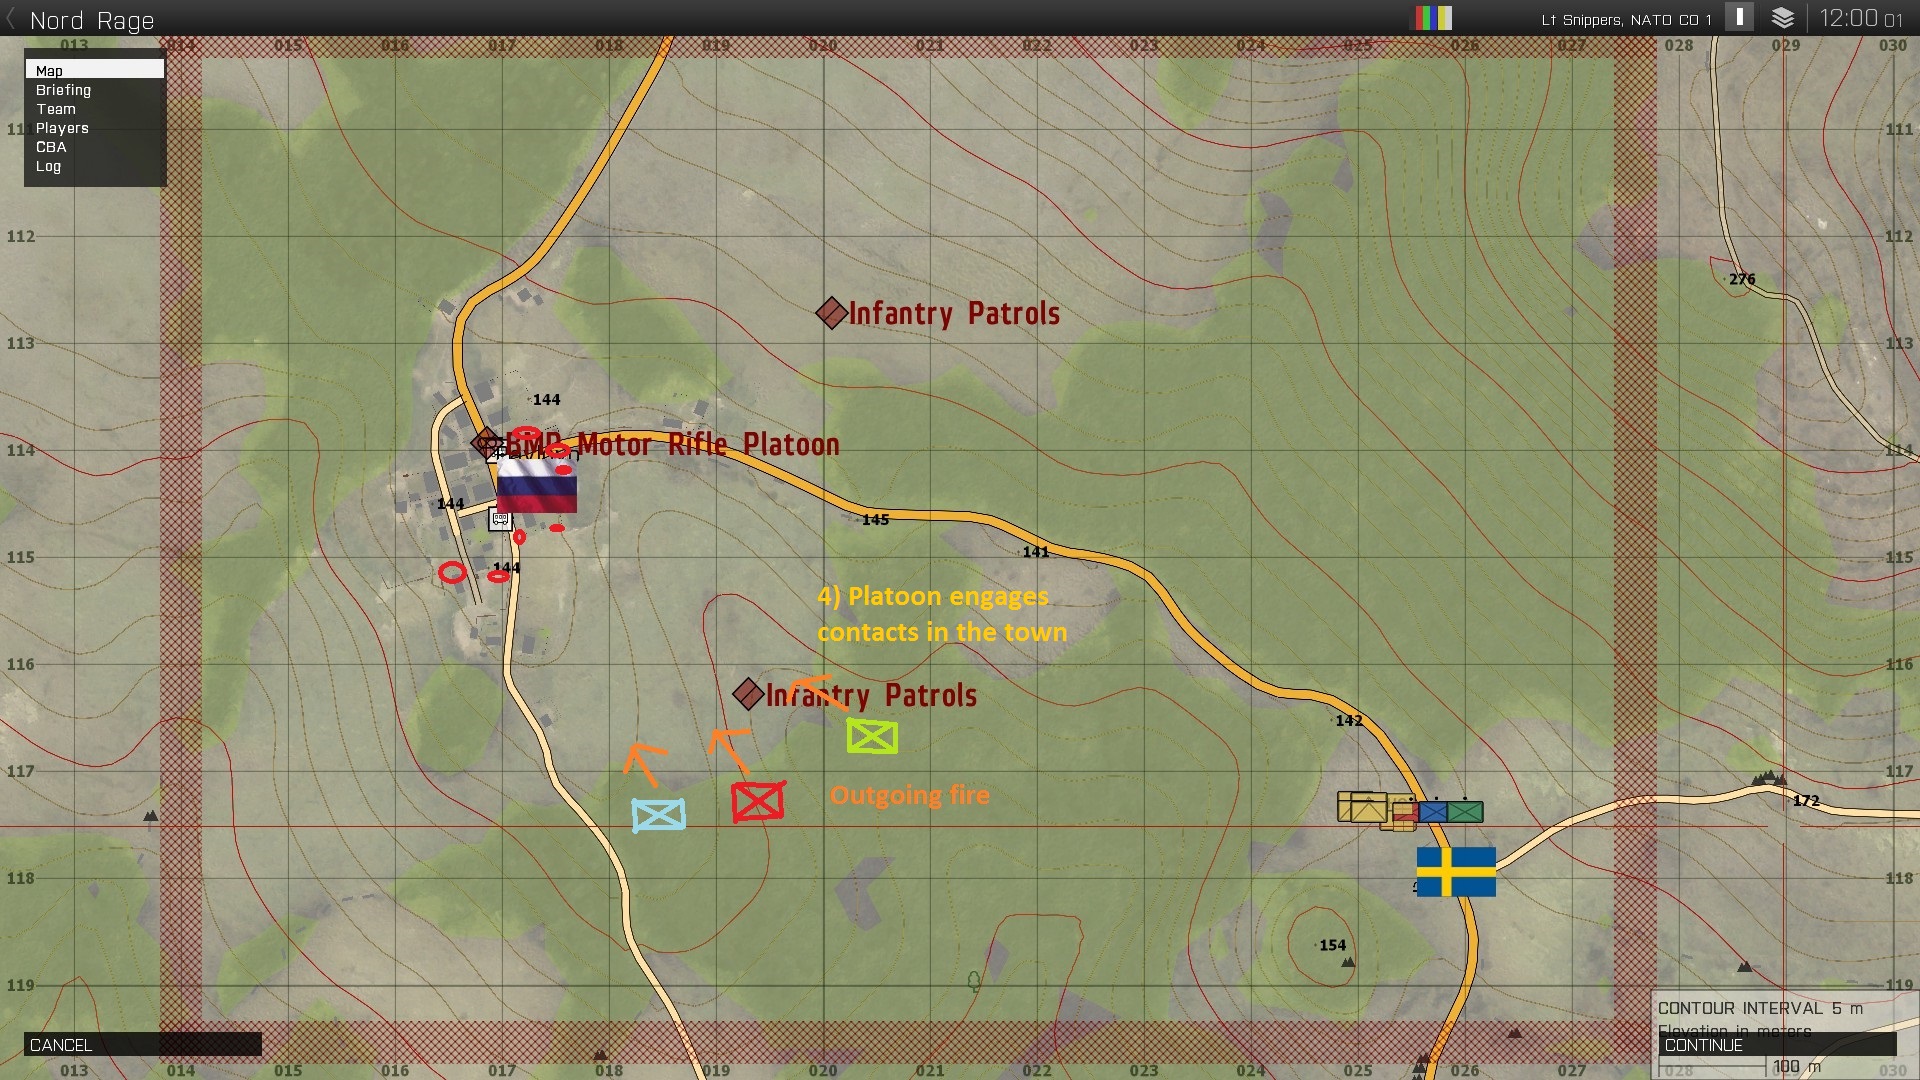
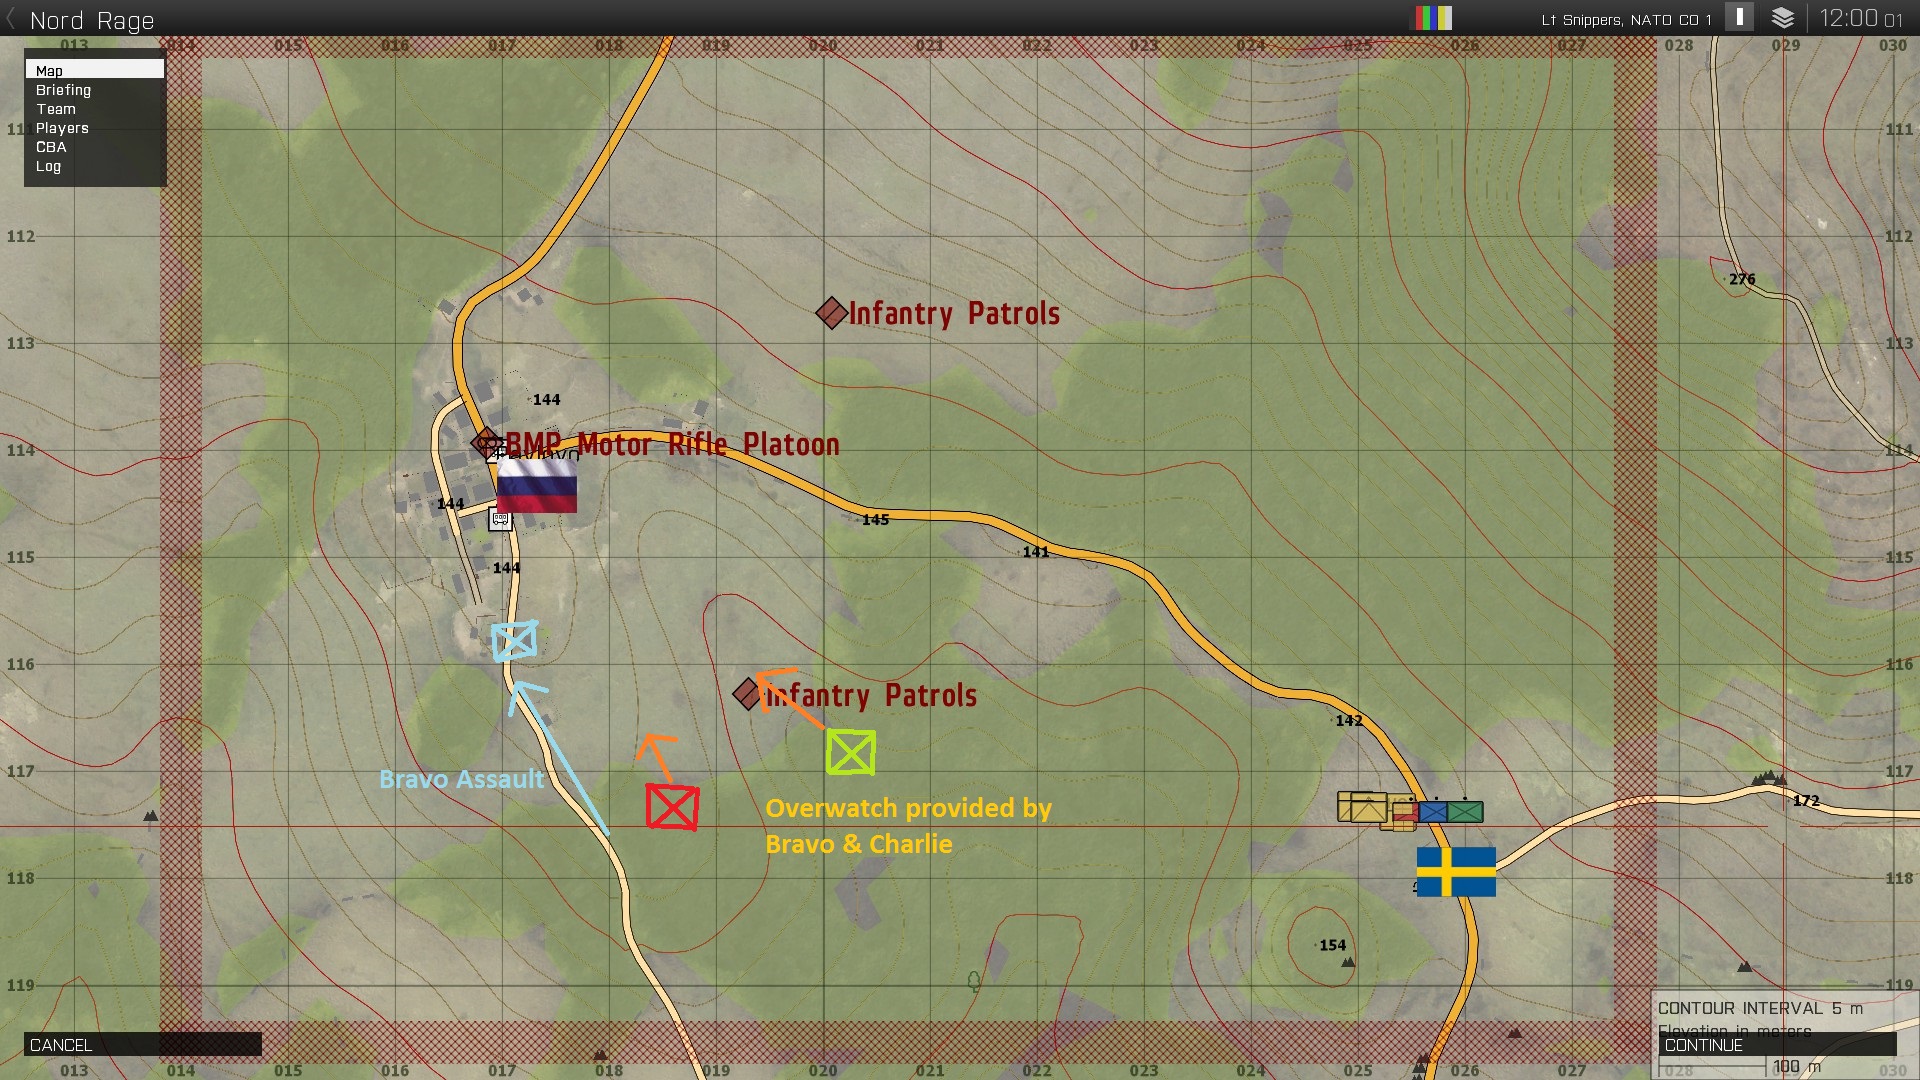
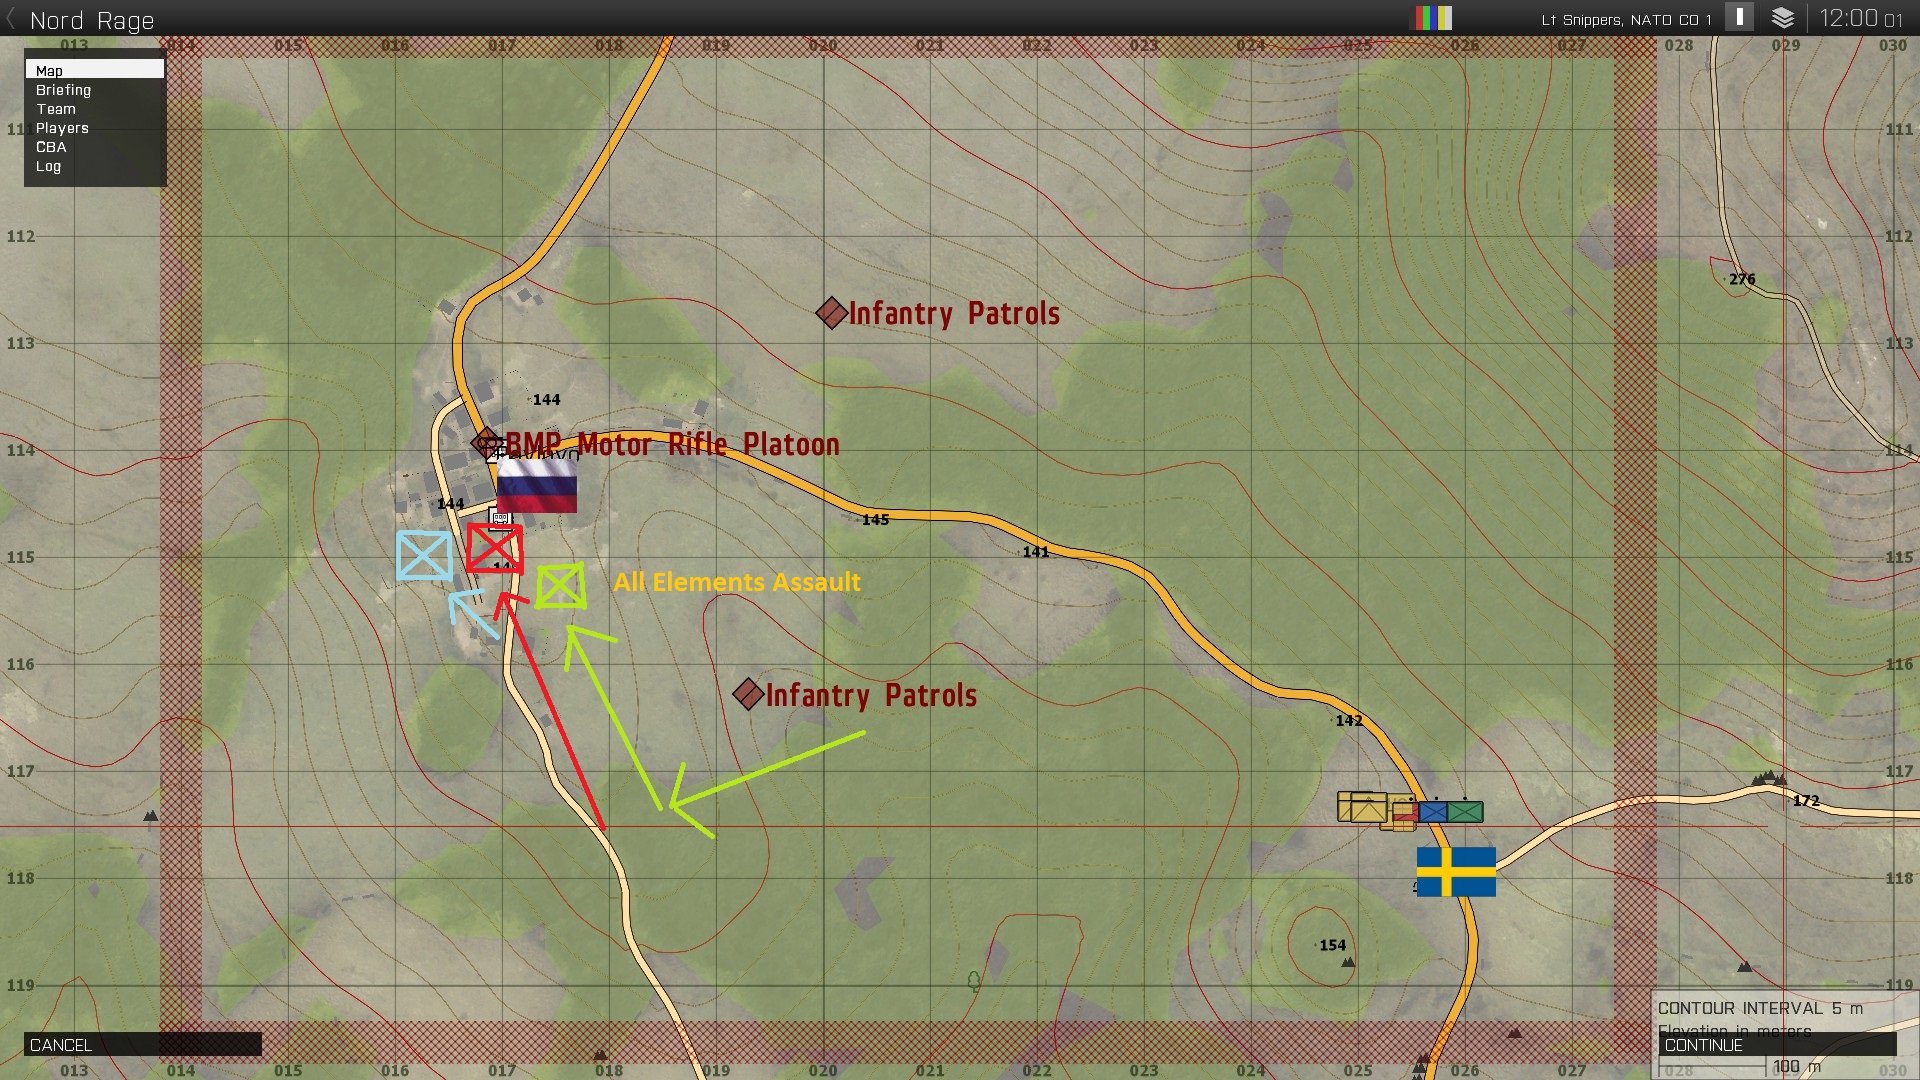
At the platoon level for maximum effectiveness in any attack it is best to commit the entire platoon.
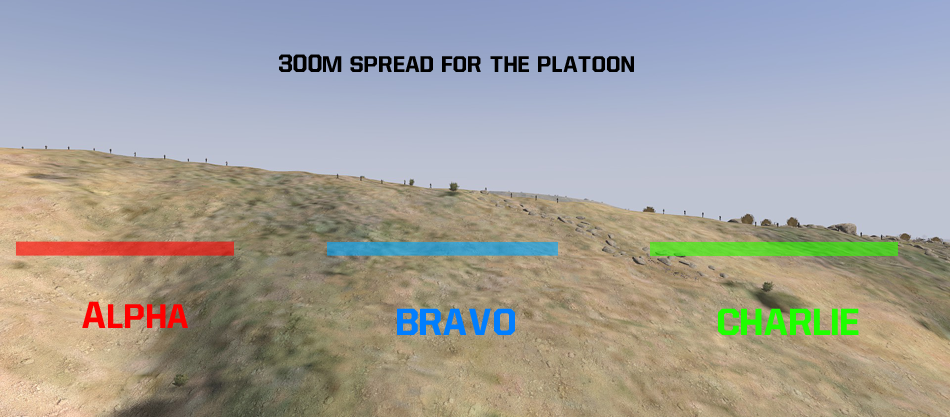
Example 1:
In this diagram I have shown an extreme example, where the entire platoon is able to engage an enemy position from a ridge, the squads are all working effectively together. Alpha and Charlie are tasked with protecting their respective flanks. This formation and spacing will require a lot of enemy firepower to be fully suppressed.
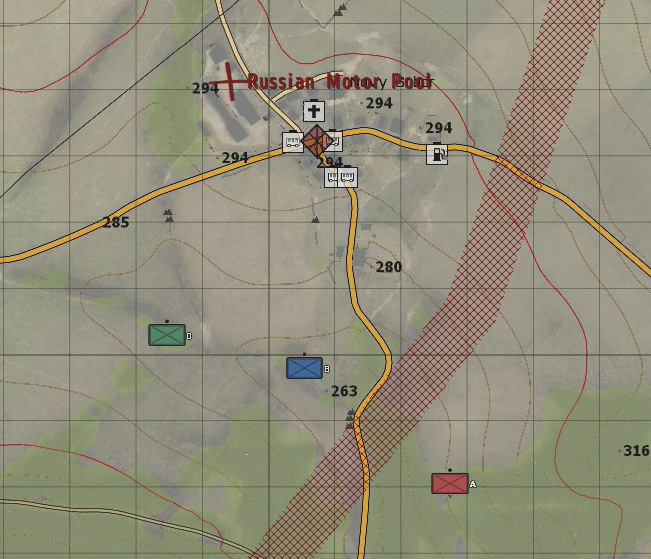
Example 2:
In this example a platoon is tasked with assaulting an objective, Alpha and Bravo are tasked with holding flanks. Here the terrain and spacing are ideal to maximize platoon visibility and support of the flanks. All squads are focusing on the primary objective.
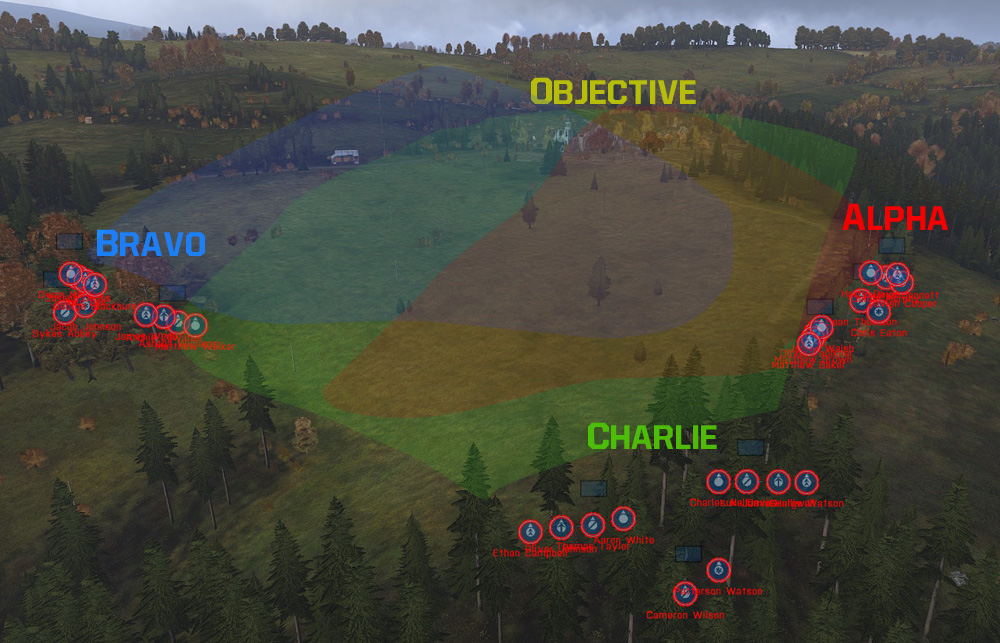
The approximate visibility of every squad is marked in their respective color.
Taking the Initiative
Using your surroundings
Often you will be tasked with moving to a position, you should attempt to make the most out of that position. It is important to understand the intent behind your orders and tasks as they will give a rough idea how far it is intended for you to deviate from a position. A commander may not know exactly what the terrain offers when you get there (not all rocks etc are marked). It is quite possible there will be a better position nearby. A great position should have clear sight lines enabling you to see approaching enemies, offer good cover and a concealed retreat path.
Example: Here we have a fireteam tasked with taking a position to watch an objective. Their position offers concealment but they are bunched together and there is little cover.
The FTL spots a better position to the right of the fireteam.
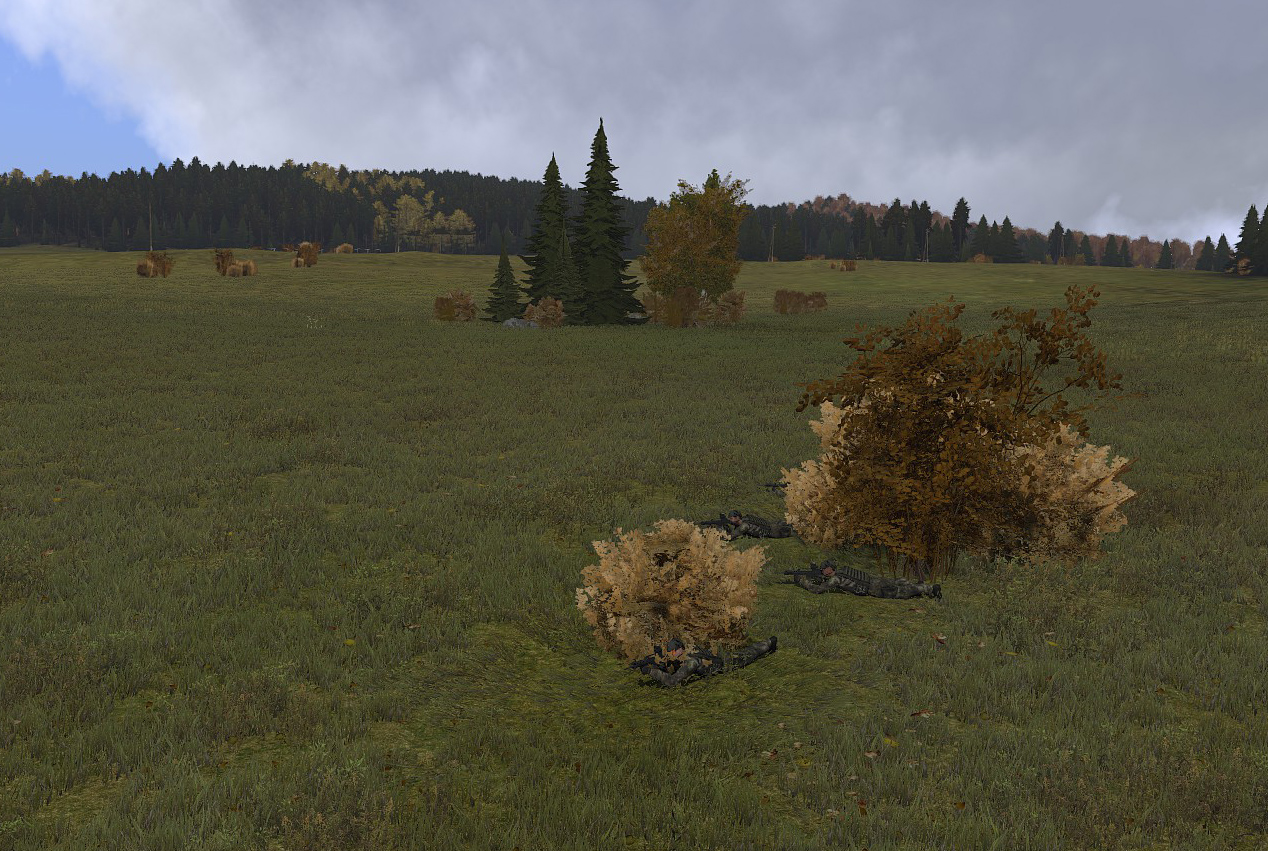
The fireteam leader decides that it is further than his squad leader would had possibly intended. The fireteam leader asks the squad leader to relocate and the squad leader approves. If you decide not to ask then you must inform your squad leader. The fireteam then relocate and are now safer with more cover and concealment.
Taking command in event of leadership loss
To be most effective the players need to coordinate together, at the start of a mission we have platoon commanders, squad leaders and fireteam leaders. In cases where these essential people die, players are required to step up and resume the important duties of these leaders.
As a subordinate you should keep track of whether your leader is alive or not as well as the loose intent of what is happening. If your leader does go down you should attempt to notify the next person in the chain of command. If you haven’t heard from your leader in a while or think they may have perished it is advisable to attempt contact them. If you unable to raise them after sometime you should assume they are dead.
Upon taking command you should attempt to retrieve appropriate radios if necessary and announce that you are taking command of the fireteam/squad/platoon as necessary, informing the leader above of this and reporting the status of your element. After this you must lead, it is as simple as telling people what to do.
