ORBAT
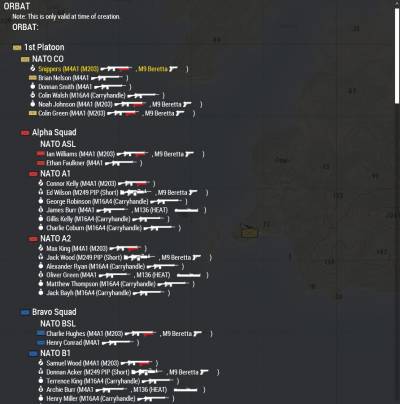
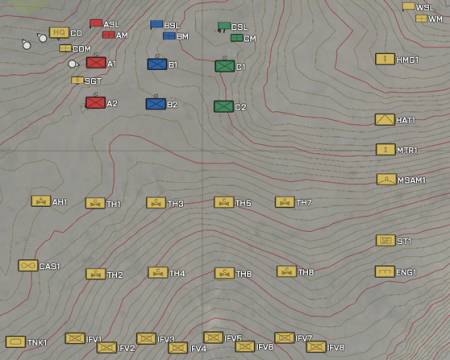
This page details how you can customize the ORBAT. The ORBAT deals with configuring the structure of the players' forces. This controls how information is presented on the briefing page and with the ingame map markers as pictured below:
The map markers and briefing page both use the same data regarding the hierarchy.
There are three concepts you need to be familiar with units, groups and virtual groups.
Unit Markers
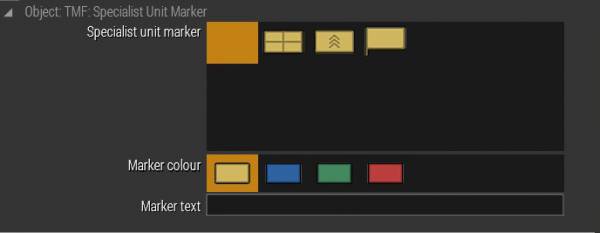
Units can have have specialist markers attached to them. These markers follow them on the map and are displayed to them on the ORBAT briefing page. These can be setup directly by right clicking on a unit in eden and going to the attributes page. Marker text is rendered next to the unit. By default this is configured for medics, squad leaders and the platoon sergeant.
Group Markers
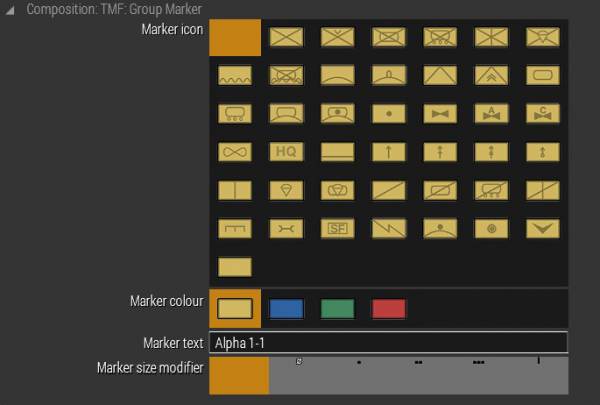
Groups in Arma are when several units are put together they form a group. Groups can also have markers attached to them. These can be configured by editing the group attributes.
Virtual Groups
Once you have configured the markers for your groups and units. You may want to having your groups and units be part of a bigger group. These collections of groups are called virtual groups. The are called virtual groups because they do not directly have units in them but rather groups. Units are always alongside their groups in the ORBAT and as such are in the same virtual group that the group they belong to is in. An example of a virtual group is a squad consisting of a few real groups. In the briefing groups in a virtual group will be placed together and their markers will consolidate to the virtual group icon if they are close on the map (dependent on map zoom).
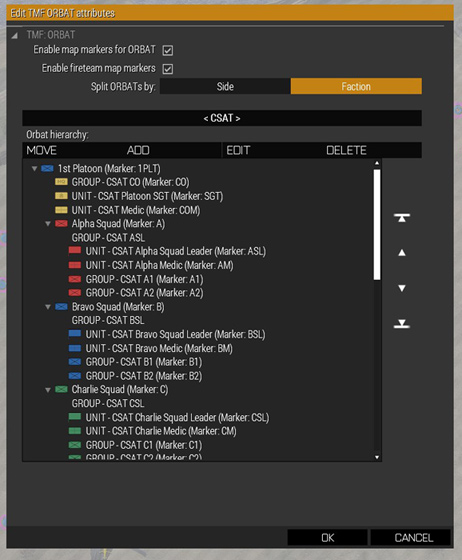
To create and manage the virtual groups you need to use the ORBAT tool. The ORBAT tool also allows you review the group and unit markers.
You can access the ORBAT tool in eden by clicking on the 'Teamwork' entry in the top tool-bar in eden and selecting “ORBAT Settings”. You will then be presented with the following tool.
The first thing to note is that data shown in the ORBAT tool is dependent on the units you have already placed. So you should always first place any units you wish to be part of the players' force. You also need to ensure these units are set as playable or they will not be shown here.
You can also edit the markers for groups and units here, but only units that already have markers are shown. You can also change the order in which things will be displayed by using the arrows on the right side.
To create new virtual groups use the add button. It will create the new virtual group as a subordinate to the group selected in the orbat page (It will only make a virtual group if its parent is a virtual group). You can also use the move tool for moving groups between virtual groups. Units will always be placed alongside the group they originated from.
ORBAT Briefing Page
The ORBAT Briefing Page will display the ORBAT the player is part of and displays a small amount of information about the units that are part of it, such as their primary, secondary, and handgun weapon type.
If units from an element are mounted into vehicles, it will display the vehicles units from that element are in, their total amount of slots and the amount of slots that have been taken.
Normally, it will display the displayName of the respective vehicles. Because this can get confusing fast if a lot of vehicles are being mounted, empty vehicles can be given an optional callsign via the Vehicle Callsign Attribute. If this callsign has been defined, it will be displayed in place of the displayName of the vehicle. This allows for easy marking of the respective vehicles.
